|
Advanced Programming |
| Notes on Creating a Sprite Sheet:
|
Animation Sprite: Sprites have been around for decades. Any game object that is within a screen and or game is represented and is considered a sprite. But to be considered an animation sprite the image must simulate a sequence of images that have been drawn while the sprite is being displayed on the screen. Animation sprites bring life to games. As you are learning to develop the code side of gaming you will also spend time with developing your images, objects, and sprites.
Right-click and save this file as tankss1.png

|
Sprite Sheet Frames: Animation sprites come with many distinctive images that are all stored on one bitmap or PNG file. When developing and creating your sprites it is important to have correct alignment with each image or frame. It is very important that textures in Direct3D must have a width and height that are powers of two for instance, 2x2, 4x4, 8x8, 16 x16, 32x32, 64x64, 128x128, 256x256, 512x512, and 1024x1024. For the most part I am going working with and teaching you under the 128x128 frame structure dimension. But, if you load an image into a texture that does not have the same dimension, Direct3D will resize your texture when it is loaded, which will result in images skewing up and most likely will be not displayed correctly. Even when using the above dimension you will still have problems as the sprites still may not be drawn correctly. Part of creating these sprites is to make sure that they are aligned in the Sprite sheet frame correctly. You will find that there is more than just creating these sprites as aligning them and testing them to confirm the sprite movements are correct or to your liking.
So to make this as simple as possible you will follow some standard structure size to make it easy. I am not expecting you to create any dynamite sprites at first as understanding the importance of the sprite sheet frame alignment must be understood.
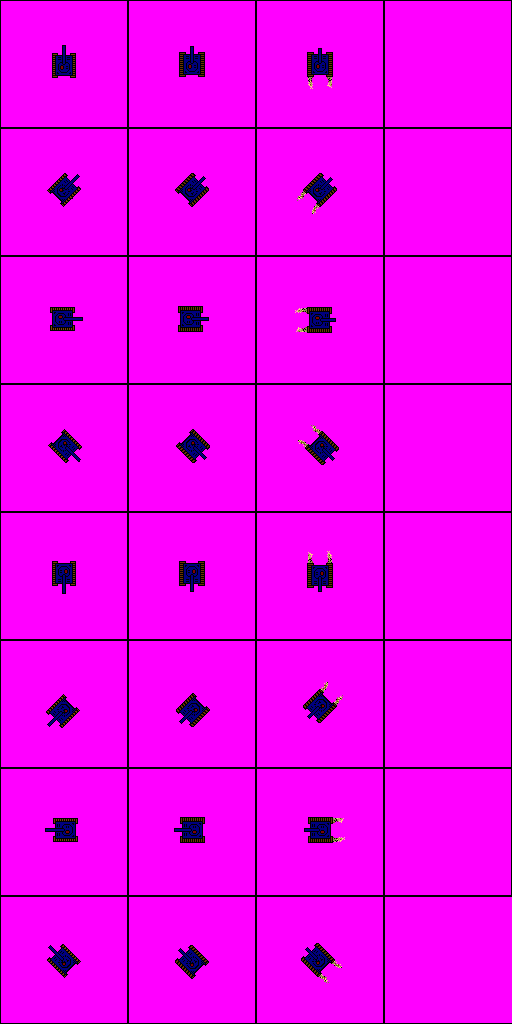
The Columns and Rows of a Sprite Sheet: You need to decide how your sprite will move to determine accurate size of your tiled frame sprite sheet. Do not be alarmed as making adjustments to these sprite sheets can occur as you build them. Even after you apply them to your program you will find that you may need to revisit the sprite graphics for additional adjustments. For example if you start by having 4 different frames for a person walking and then change it to 8 frames, then your actual sprite sheet dimensions will become larger. Below is an example of that same tank that was used in the last example problem. Now what you see below is this same tank but taking on 16 different images or frames of an animation sprite. The tank can travel or move in any of the eight directions and has three frames of animation. Loading these frames onto a program will come in the next notes and the example problem but for now, we must continue to review how to develop a sprite sheet. Go ahead and copy this image (below) to your file location. We will then need to take out the grid lines once you are done and make this a transparency image or sprite.
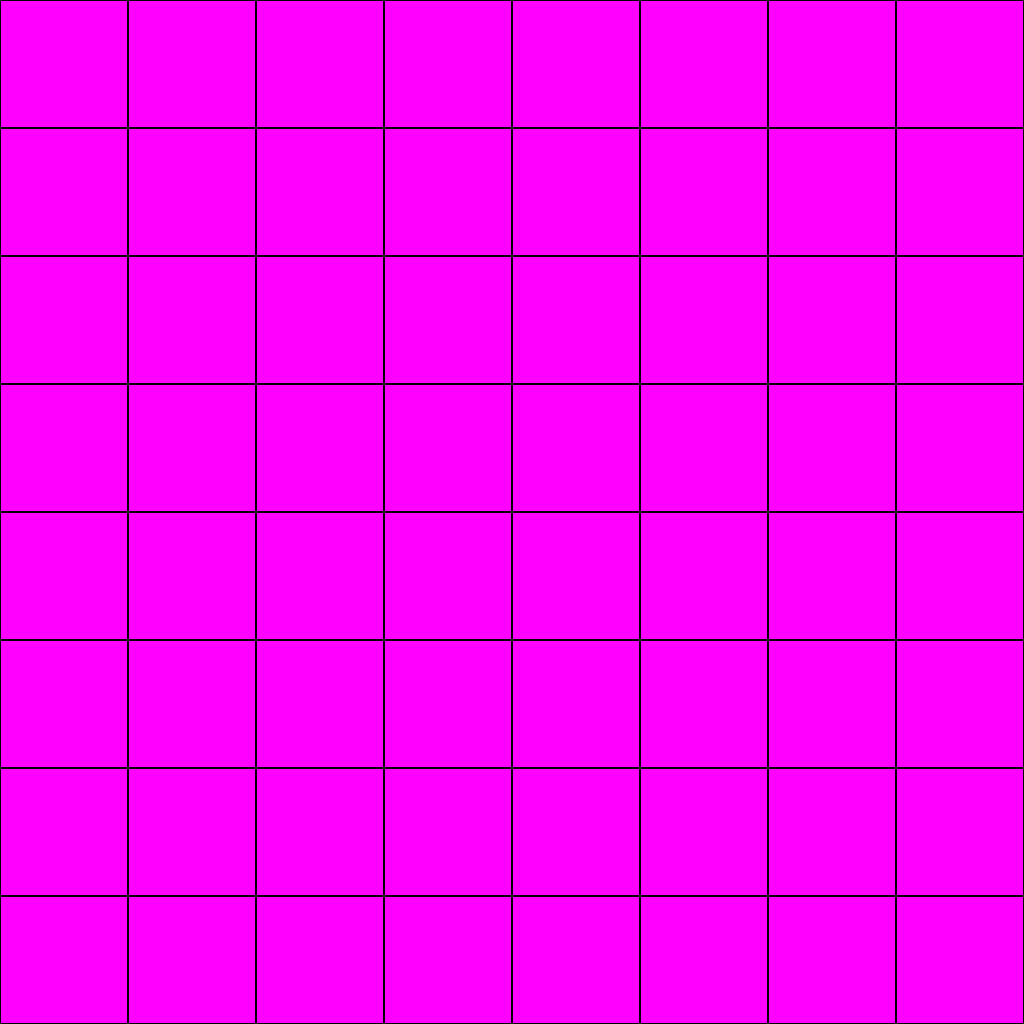
The key with animating a sprite is to keep track of the current frame of animation along with the animation frame in the sequence. At this time the above frame has 8 rows and 4 columns. Each of the first 3 columns frames has a tank or sprite within the 128 x 128 area with the width being 128 and height being 128. But this whole canvas is 512 x1024, do the math. Notice that the image has been divided into grids or better yet frames. I have placed black grid line or boxes to assist and help to define these different frame sections. These grid lines will need to be erased once all images or sprites are done (to your liking) so you do not see the lines. Steps below will further discuss the development of this sprite sheet.
|
The Magic Pink: Oh yes, that bright pink color. When developing your sprites sheet you will need to work the any of the RGB colors; Red, Green, Blue or a combination of two of these colors. I am asking you to work with the pink background, which is our transparent color since no-one in their right minds would actually use it as a color within their sprite. We have to note the RGB value of this color. This magenta (pink) color is, actually RGB (255, 0, 255). Remember these numbers... Why? Because again, it is seldom used in game graphics and shows up brightly in the source image. You can instantly spot the transparent pixels in such an image. In short, game designers use the magenta color to help covert the paint image into a transparency sprite. You will be following the steps below to convert this tank to a transparent image as you reuse and finish the sprite sheet. But I also want to provide you with a 1024x1024 sprite sheet already with the grid line image that you can copy and use when you start to develop your own images/sprite. Copy and save this file so you have a canvas to start with. Please note that I scaled down this canvas and is large that appear here.
Right-click and save this file as sprite sheet.png
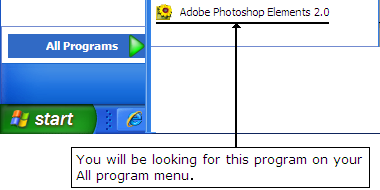
Example #18 (Creating your First Transparent Sprite): There are tons of programs on the market that allow you to work with sprite images and in fact you will be looking at using one in this class down the road. But first we are going to start out using the Windows Paint program and the Adobe Photoshop applications to learn how to make a transparent sprite.
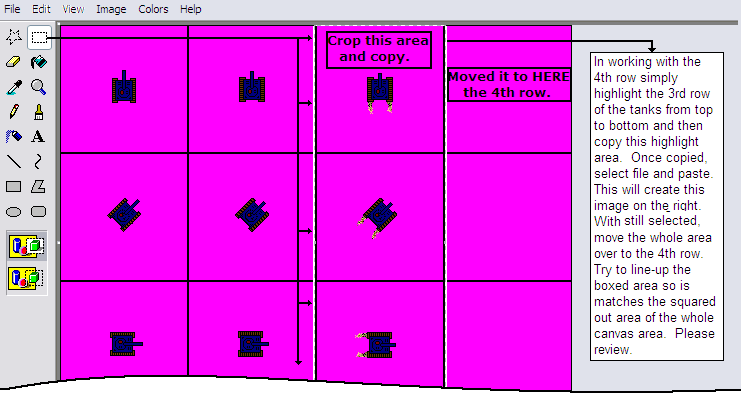
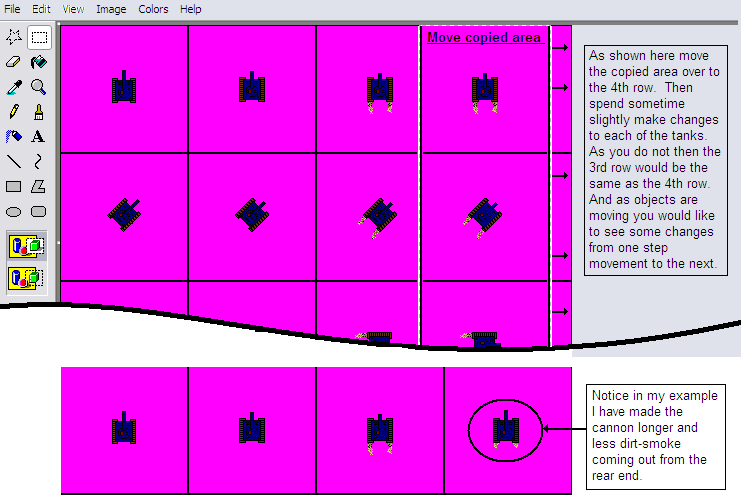
1. Let’s start by loading that above file called tankss1.png that you just saved to your files into the Windows Paint program. The ss in the file name stands for sprite sheet. If there were needed image changes this is the time that you would need to spend make those graphic design changes. In fact, in this example problem I want you to work with the 4th column of images. The 1st, 2nd and 3rd column images are slightly different from each other where as the 4th column is blank. Your attention over the next few minutes is to work with the tanks in the 4th column to slightly make adjustments to them. Simple start by copying the frames in 3rd column to the 4th column and adjust the graphic slightly. Try not to use another color that is present. Simply change the object size or shape. It is important that you try to keep the image in the same location (with in the middle of the frames) and keep the object pointing in the same direction that you presently see them. Again simply make minor adjustments to each of the eight tanks. Once you are done save the resave the PNG file.


|
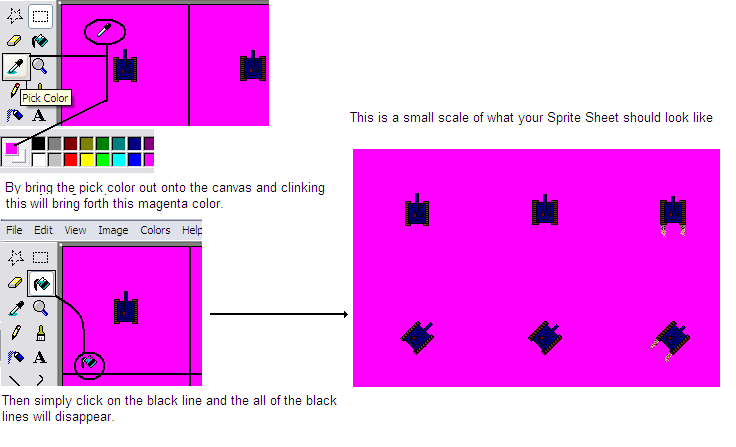
2. Once done with all editing let’s now take off the black grid lines that are placed inside each of the frames of this sprite sheet. This is an easy process by using the pick color tool and selecting the magenta color with the paint canvas so your paint tool pallet brings this color forward. Then select the Fill tool, which is better know as the paint bucket and then place the Fill tool over the black grid line. This step will make the grid line change color and will blend in with the present and same color of the magenta color. In short, the black grid lines of the frames will disappear. This is an important step that must be done once you are finished with all of you sprites. The entire background of this sprite sheet must be the same color. Again simply resaving the file and then close the paint program. But, it is sometimes good to save the program twice, one with the black grid lines and one without the grid lines. If it calls for you to go back and to continue working with the sprit sheet, you will need to have those black grid lines on to help assist with the structure of each sprite.
|

|
|
3. Now you are ready to cover this PNG image into a transparent PNG image format. Open the Adobe Photoshop program. Once Photoshop is running, click on the "File" menu from the top panel. Select "Open" and choose the image file you would like to convert, which should be the file tankss1.png. Please note, I do not plan to teach you concepts about PhotoShop other than try to use this program to convert an image file over to transparent.
|

|
4. Now you are ready to make your image file transparent. You can use either the magic wand tool or the magic eraser tool. I tend to use the wand tool and will use this tool to convert image. Then with the magic wand selected click the left mouse button and drag to select the PINK area or the desired area of the sprite sheet. Once you have selected the proper area, you will see a dotted line appear all over and around the sprite sheet. At this point simply hit the backspace or delete key on the keyboard. This will allow the pink area of the sprite sheet to turn into and display as a checker boxed gray and white area. Once this occurs, you have success converted your sprite sheet to a transparent file.
 5. Once you are done with getting the PNG image into a transparent PNG let’s go ahead and conduct a Save as and call it tank1.png into your file location. This will be a different name than what you sved it as before. This image we will work with in our next notes and example problem. So make sure you have it save in a location that you know were it is at. Also please do not open it again in the paint program as you may need to conduct the Photoshop transparent steps yet then again.
Online Free Sprite Images: There are many online web sites that provide free sprites. Below are two links that I feel provide a ton of free sprite images that already have been created, designed and can be copied are reused. In fact, this is where the above tanks came from. Please take a second to review this web site. Game Sprite:
http://gamesprites.wikicomplete.info/system:list-all-pages
http://reinerstileset.4players.de/englisch.html
http://spritecity0.tripod.com/id4.html
http://www.spriters-resource.com/
http://www.spritesheets.net/
http://sdb.drshnaps.com/index.php
Teacher’s Comment: A lot of time can be spent developing your sprites and sprite sheets. In fact, most game designers spend even more time in this area. Like programming, it takes time to develop good looking sprites for your game. Be prepared to spend time in the developmental and design of your sprite. I do plan to introduce another paint program that can assist the user with developing them further.
